![How to Customize Your WordPress Theme [2021]](https://gplfreetheme.in/wp-content/uploads/2021/06/How-to-Customize-Your-WordPress-Theme-2021.jpg)
अपनी वर्डप्रेस थीम को कस्टमाइज़ करने से आपकी वेबसाइट की उपस्थिति और कार्यक्षमता बदल सकती है। चाहे आप एक अनुभवी वर्डप्रेस उपयोगकर्ता हों या अभी शुरुआत कर रहे हों, यह व्यापक मार्गदर्शिका आपको अपने ब्रांड से मेल खाने और अपने ऑनलाइन लक्ष्यों को प्राप्त करने के लिए अपनी थीम को अनुकूलित करने में सशक्त बनाएगी।
वर्डप्रेस थीम अनुकूलन को समझना
वर्डप्रेस थीम आपकी वेबसाइट के डिज़ाइन की नींव हैं, जो लेआउट, रंग, टाइपोग्राफी और समग्र सौंदर्य को नियंत्रित करती हैं। जबकि कई थीम एक अच्छा शुरुआती बिंदु प्रदान करती हैं, अनुकूलन आपको एक अद्वितीय और वैयक्तिकृत ऑनलाइन उपस्थिति बनाने की अनुमति देता है।
थीम अनुकूलन के दो मुख्य दृष्टिकोण
थीम कस्टमाइज़र: अधिकांश आधुनिक वर्डप्रेस थीम एक अंतर्निहित थीम कस्टमाइज़र, एक उपयोगकर्ता-अनुकूल इंटरफ़ेस से सुसज्जित हैं जो आपको कोडिंग ज्ञान के बिना अपने थीम के विभिन्न पहलुओं को संशोधित करने में सक्षम बनाता है।
डायरेक्ट थीम फ़ाइल संपादन: अधिक उन्नत अनुकूलन के लिए, आप थीम फ़ाइलों को सीधे संपादित कर सकते हैं, जो आमतौर पर PHP, HTML और CSS में लिखी जाती हैं। इस दृष्टिकोण के लिए वेब विकास भाषाओं से परिचित होना आवश्यक है।
आवश्यक थीम अनुकूलन तत्व
लेआउट: हेडर, साइडबार और सामग्री अनुभागों के प्लेसमेंट सहित अपनी वेबसाइट की समग्र संरचना को अनुकूलित करें।
रंग: ऐसा रंग पैलेट चुनें जो आपके ब्रांड की पहचान को दर्शाता हो और एक आकर्षक अनुभव प्रदान करता हो।
टाइपोग्राफी: ऐसे फ़ॉन्ट चुनें जो आपकी वेबसाइट की शैली से मेल खाते हों और पठनीयता बढ़ाते हों।
छवियाँ और ग्राफ़िक्स: अपनी सामग्री को पूरक बनाने और आगंतुकों को आकर्षित करने के लिए उच्च-गुणवत्ता वाली छवियां और ग्राफ़िक्स शामिल करें।
विजेट्स और प्लगइन्स: अपनी वेबसाइट के विशिष्ट क्षेत्रों में कार्यक्षमता जोड़ने के लिए विजेट्स का उपयोग करें, और इसकी क्षमताओं को बढ़ाने के लिए प्लगइन्स इंस्टॉल करें।
चरण-दर-चरण थीम अनुकूलन प्रक्रिया
एक अनुकूलन योग्य थीम चुनें: एक ऐसी थीम चुनें जो पर्याप्त अनुकूलन विकल्प प्रदान करती हो और आपकी वेबसाइट के उद्देश्य के साथ संरेखित हो।
थीम कस्टमाइज़र से खुद को परिचित करें: उपलब्ध विकल्पों को समझने के लिए थीम कस्टमाइज़र की सेटिंग्स का अन्वेषण करें और जानें कि वे आपकी वेबसाइट की उपस्थिति को कैसे प्रभावित करते हैं।
अपने अनुकूलन लक्ष्यों को परिभाषित करें: अपने विषय के उन पहलुओं को स्पष्ट रूप से पहचानें जिन्हें आप अपने वांछित दृश्य और कार्यात्मक लक्ष्यों को प्राप्त करने के लिए संशोधित करना चाहते हैं।
धीरे-धीरे बदलाव करें: छोटे समायोजनों से शुरुआत करें और आगे बढ़ने से पहले परिणामों का पूर्वावलोकन करें। यह दृष्टिकोण आपको सूचित निर्णय लेने और गलतियों से बचने की अनुमति देता है।
कार्यक्षमता का पूरी तरह से परीक्षण करें: सुनिश्चित करें कि सभी अनुकूलन विभिन्न ब्राउज़रों और उपकरणों पर इच्छित तरीके से कार्य करते हैं।
सफल थीम अनुकूलन के लिए अतिरिक्त युक्तियाँ
अपनी थीम का बैकअप लें: कोई भी महत्वपूर्ण बदलाव करने से पहले, जरूरत पड़ने पर वापस लाने के लिए अपनी थीम फ़ाइलों का बैकअप बनाएं।
अन्य वेबसाइटों से प्रेरणा लें: विचार और प्रेरणा इकट्ठा करने के लिए अच्छी तरह से डिज़ाइन की गई वेबसाइटों के उदाहरण ब्राउज़ करें।
वर्डप्रेस संसाधनों का उपयोग करें: मार्गदर्शन और समस्या-समाधान के लिए वर्डप्रेस दस्तावेज़, ट्यूटोरियल और फ़ोरम देखें।
व्यावसायिक सहायता लें: यदि आप जटिल अनुकूलन चुनौतियों का सामना करते हैं, तो वर्डप्रेस डेवलपर से सहायता लेने पर विचार करें।
याद रखें, अपनी वर्डप्रेस थीम को कस्टमाइज़ करना एक सतत प्रक्रिया है, और आप अपनी ज़रूरतों के अनुसार हमेशा अपनी वेबसाइट के डिज़ाइन को परिष्कृत और बढ़ा सकते हैं। इन दिशानिर्देशों का पालन करके और रचनात्मकता को अपनाकर, आप एक अद्वितीय और प्रभावशाली ऑनलाइन उपस्थिति बना सकते हैं जो वास्तव में आपके ब्रांड का प्रतिनिधित्व करती है और आपके लक्षित दर्शकों के साथ मेल खाती है।
![How to Customize Your WordPress Theme [2023]](https://gplfreetheme.in/wp-content/uploads/2021/06/1-1024x456.jpg)
एक वर्डप्रेस थीम इंस्टॉल करना
वर्डप्रेस थीम आपकी वेबसाइट के डिज़ाइन की नींव हैं। वे आपकी साइट के लेआउट, रंग, टाइपोग्राफी और समग्र सौंदर्य को नियंत्रित करते हैं। वर्डप्रेस विभिन्न प्रकार की मुफ्त थीम के साथ आता है, और खरीद के लिए कई प्रीमियम थीम भी उपलब्ध हैं।
वर्डप्रेस थीम इंस्टॉल करने के चरण:
अपने वर्डप्रेस एडमिन डैशबोर्ड में लॉग इन करें।
उपस्थिति > थीम्स पर नेविगेट करें।
“नया जोड़ें” बटन पर क्लिक करें।
खोज फ़ील्ड का उपयोग करके वह थीम खोजें जिसे आप इंस्टॉल करना चाहते हैं।
एक बार जब आपको अपनी इच्छित थीम मिल जाए, तो “इंस्टॉल करें” बटन पर क्लिक करें।
एक बार थीम इंस्टॉल हो जाने के बाद, “सक्रिय करें” बटन पर क्लिक करें।
एफ़टीपी के माध्यम से एक वर्डप्रेस थीम इंस्टॉल करना
यदि आपने किसी भिन्न स्रोत से थीम फ़ाइल डाउनलोड की है, तो आप इसे एफ़टीपी के माध्यम से इंस्टॉल कर सकते हैं। यहां चरण दिए गए हैं:
थीम फ़ाइल को अपने कंप्यूटर पर डाउनलोड करें.
यदि यह एक ज़िप संग्रह है तो थीम फ़ाइल निकालें।
अपनी वेबसाइट के सर्वर से कनेक्ट करने के लिए एफ़टीपी क्लाइंट का उपयोग करें।
अपने सर्वर पर wp-content/themes फ़ोल्डर पर जाएँ।
थीम फ़ोल्डर को अपने सर्वर पर थीम फ़ोल्डर में अपलोड करें।
अपने वर्डप्रेस एडमिन डैशबोर्ड में लॉग इन करें और Appearance > Themes पर जाएं।
थीम अब स्थापित थीम की सूची में दिखाई देनी चाहिए। इसे अपनी वेबसाइट के लिए सक्रिय थीम बनाने के लिए “सक्रिय करें” बटन पर क्लिक करें।
वर्डप्रेस प्लगइन इंस्टॉल करना
वर्डप्रेस प्लगइन्स ऐड-ऑन हैं जो आपकी वर्डप्रेस साइट की कार्यक्षमता को बढ़ाते हैं। एसईओ, सुरक्षा, सोशल मीडिया एकीकरण और बहुत कुछ सहित विभिन्न उद्देश्यों के लिए हजारों प्लगइन्स उपलब्ध हैं।
वर्डप्रेस प्लगइन स्थापित करने के चरण:
अपने वर्डप्रेस एडमिन डैशबोर्ड में लॉग इन करें।
प्लगइन्स > नया जोड़ें पर नेविगेट करें।
खोज फ़ील्ड का उपयोग करके वह प्लगइन खोजें जिसे आप इंस्टॉल करना चाहते हैं।
एक बार जब आपको अपना इच्छित प्लगइन मिल जाए, तो “अभी इंस्टॉल करें” बटन पर क्लिक करें।
एक बार प्लगइन इंस्टॉल हो जाने पर, “सक्रिय करें” बटन पर क्लिक करें।
एफ़टीपी के माध्यम से एक वर्डप्रेस प्लगइन स्थापित करना
यदि आपने किसी भिन्न स्रोत से प्लगइन फ़ाइल डाउनलोड की है, तो आप इसे एफ़टीपी के माध्यम से इंस्टॉल कर सकते हैं। यहां चरण दिए गए हैं:
अपने कंप्यूटर पर प्लगइन फ़ाइल डाउनलोड करें।
यदि यह एक ज़िप संग्रह है तो प्लगइन फ़ाइल निकालें।
अपनी वेबसाइट के सर्वर से कनेक्ट करने के लिए एफ़टीपी क्लाइंट का उपयोग करें।
अपने सर्वर पर wp-content/plugins फ़ोल्डर पर जाएँ।
प्लगइन फ़ोल्डर को अपने सर्वर पर प्लगइन फ़ोल्डर में अपलोड करें।
अपने वर्डप्रेस एडमिन डैशबोर्ड में लॉग इन करने के बाद प्लगइन्स > इंस्टॉल किए गए प्लगइन्स पर जाएँ।
प्लगइन अब इंस्टॉल किए गए प्लगइन्स की सूची में दिखना चाहिए। इसे अपनी वेबसाइट पर सक्षम करने के लिए “सक्रिय करें” बटन पर क्लिक करें।
वर्डप्रेस थीम और प्लगइन्स इंस्टॉल करना
वर्डप्रेस थीम और प्लगइन्स आपकी वर्डप्रेस वेबसाइट की उपस्थिति और कार्यक्षमता को आकार देने में महत्वपूर्ण भूमिका निभाते हैं। थीम आपकी साइट के समग्र डिज़ाइन और लेआउट को निर्धारित करती हैं, जबकि प्लगइन्स विभिन्न सुविधाओं के साथ इसकी क्षमताओं का विस्तार करते हैं।
एक वर्डप्रेस थीम इंस्टॉल करना
वर्डप्रेस एडमिन डैशबोर्ड तक पहुंचें: अपने क्रेडेंशियल्स का उपयोग करके अपने वर्डप्रेस एडमिन डैशबोर्ड में लॉग इन करें।
उपस्थिति > थीम्स पर नेविगेट करें: बाएं साइडबार मेनू से, “प्रकटन” चुनें और फिर “थीम्स” चुनें।
“नया जोड़ें” बटन पर क्लिक करें: थीम पृष्ठ पर “नया जोड़ें” बटन का पता लगाएं और थीम इंस्टॉलेशन प्रक्रिया शुरू करने के लिए इसे क्लिक करें।
वांछित थीम खोजें: जिस थीम को आप इंस्टॉल करना चाहते हैं उसे ढूंढने के लिए खोज बार का उपयोग करें। आप थीम सुविधाओं, लोकप्रियता और अन्य मानदंडों के आधार पर परिणामों को फ़िल्टर कर सकते हैं।
थीम इंस्टॉल और सक्रिय करें: एक बार जब आपको अपनी पसंदीदा थीम मिल जाए, तो “इंस्टॉल करें” बटन पर क्लिक करें। इंस्टॉलेशन पूरा होने के बाद, इसे अपनी वेबसाइट के लिए सक्रिय थीम बनाने के लिए “सक्रिय करें” बटन पर क्लिक करें।
एफ़टीपी (फ़ाइल ट्रांसफर प्रोटोकॉल) के माध्यम से वर्डप्रेस थीम इंस्टॉल करना
यदि आपने किसी बाहरी स्रोत से थीम फ़ाइल डाउनलोड की है, तो आप इसे एफ़टीपी का उपयोग करके इंस्टॉल कर सकते हैं। ऐसे:
थीम फ़ाइल को डाउनलोड करें और निकालें: थीम फ़ाइल को, आमतौर पर ज़िप प्रारूप में, अपने कंप्यूटर पर डाउनलोड करें। थीम फ़ाइल की सामग्री निकालें.
अपनी वेबसाइट के सर्वर से कनेक्ट करें: अपनी वेबसाइट के सर्वर से कनेक्ट करने के लिए एफ़टीपी क्लाइंट का उपयोग करें। आपको एफ़टीपी सर्वर पता, उपयोगकर्ता नाम और पासवर्ड की आवश्यकता होगी।
थीम फ़ोल्डर अपलोड करें: अपने सर्वर पर wp-content/themes फ़ोल्डर पर नेविगेट करें। निकाले गए थीम फ़ोल्डर को इस स्थान पर अपलोड करें।
वर्डप्रेस में थीम सक्रिय करें: अपने वर्डप्रेस एडमिन डैशबोर्ड में लॉग इन करें और Appearance > Themes पर जाएं। अपलोड की गई थीम अब इंस्टॉल की गई थीम की सूची में दिखाई देनी चाहिए। इसे सक्रिय थीम बनाने के लिए “सक्रिय करें” बटन पर क्लिक करें।
वर्डप्रेस प्लगइन इंस्टॉल करना
प्लगइन्स तक पहुंचें > नया पेज जोड़ें: वर्डप्रेस एडमिन डैशबोर्ड से, प्लगइन्स पर नेविगेट करें और फिर “नया जोड़ें” पर क्लिक करें।
प्लगइन खोजें: जिस प्लगइन को आप इंस्टॉल करना चाहते हैं उसे ढूंढने के लिए खोज बार का उपयोग करें। आप प्लगइन कार्यक्षमता, लोकप्रियता और अन्य मानदंडों के आधार पर परिणामों को फ़िल्टर कर सकते हैं।
प्लगइन इंस्टॉल और सक्रिय करें: एक बार जब आपको वांछित प्लगइन मिल जाए, तो “अभी इंस्टॉल करें” बटन पर क्लिक करें। इंस्टॉलेशन पूरा होने के बाद, अपनी वेबसाइट पर प्लगइन को सक्षम करने के लिए “सक्रिय करें” बटन पर क्लिक करें।
एफ़टीपी के माध्यम से एक वर्डप्रेस प्लगइन स्थापित करना
यदि आपने किसी बाहरी स्रोत से प्लगइन फ़ाइल डाउनलोड की है, तो आप इसे FTP का उपयोग करके इंस्टॉल कर सकते हैं:
प्लगइन फ़ाइल डाउनलोड करें और निकालें: प्लगइन फ़ाइल डाउनलोड करें, आमतौर पर ज़िप प्रारूप में, अपने कंप्यूटर पर। प्लगइन फ़ाइल की सामग्री निकालें.
अपनी वेबसाइट के सर्वर से कनेक्ट करें: अपनी वेबसाइट के सर्वर से कनेक्ट करने के लिए एफ़टीपी क्लाइंट का उपयोग करें। आपको एफ़टीपी सर्वर पता, उपयोगकर्ता नाम और पासवर्ड की आवश्यकता होगी।
प्लगइन फ़ोल्डर अपलोड करें: अपने सर्वर पर wp-content/plugins फ़ोल्डर पर जाएँ। निकाले गए प्लगइन फ़ोल्डर को इस स्थान पर अपलोड करें।
वर्डप्रेस में प्लगइन सक्रिय करें: अपने वर्डप्रेस एडमिन डैशबोर्ड में लॉग इन करें और प्लगइन्स > इंस्टॉल किए गए प्लगइन्स पर जाएं। अपलोड किया गया प्लगइन अब इंस्टॉल किए गए प्लगइन्स की सूची में दिखना चाहिए। इसे अपनी वेबसाइट पर सक्षम करने के लिए “सक्रिय करें” बटन पर क्लिक करें।
अतिरिक्त युक्तियाँ:
विश्वसनीय स्रोतों से थीम और प्लगइन्स चुनें: सुरक्षा और अनुकूलता सुनिश्चित करने के लिए केवल प्रतिष्ठित वर्डप्रेस रिपॉजिटरी या डेवलपर्स से थीम और प्लगइन्स इंस्टॉल करें।
थीम और प्लगइन्स को अपडेट रखें: सुरक्षा बनाए रखने और नवीनतम सुविधाओं तक पहुंचने के लिए नियमित रूप से अपने थीम और प्लगइन्स के अपडेट की जांच करें।
अपनी वेबसाइट का बैकअप लें: अप्रत्याशित समस्याओं के मामले में अपने डेटा की सुरक्षा के लिए नियमित रूप से अपनी वर्डप्रेस वेबसाइट का बैकअप लें।
इन चरणों का पालन करके और अतिरिक्त युक्तियों का पालन करके, आप अपनी वेबसाइट के डिज़ाइन और कार्यक्षमता को बढ़ाने के लिए वर्डप्रेस थीम और प्लगइन्स को प्रभावी ढंग से इंस्टॉल और प्रबंधित कर सकते हैं।
- Multi-Purpose WordPress Themes: Your Comprehensive Guide

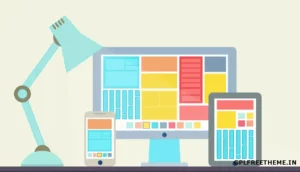
- Responsive WordPress Themes: The Key to a Mobile-Friendly Website

- Comprehensive Guide to Customizing Your GeneratePress Theme

- Shared Hosting in 2023: Unlocking SEO-Friendly Rankings on Google

- Top 10 Best and Affordable Hosting Providers in India [2023]

- OnePlus 9R vs. OnePlus 8T Full Comparison: Which One to Buy?

- SSDs vs. Hard Drives vs. Hybrid Drives: A Comprehensive Guide [2024]

- How to Quickly Create an FTP Account in cPanel [2024]
![How to Quickly Create an FTP Account in CPanel [2023]](data:image/svg+xml;base64,PHN2ZyB4bWxucz0iaHR0cDovL3d3dy53My5vcmcvMjAwMC9zdmciIHdpZHRoPSIzMDAiIGhlaWdodD0iMTU1IiB2aWV3Qm94PSIwIDAgMzAwIDE1NSI+PHJlY3Qgd2lkdGg9IjEwMCUiIGhlaWdodD0iMTAwJSIgc3R5bGU9ImZpbGw6I2NmZDRkYjtmaWxsLW9wYWNpdHk6IDAuMTsiLz48L3N2Zz4=)
- Divi vs. Elementor: Which WordPress Page Builder Is Better in 2023?


![How to Quickly Create an FTP Account in CPanel [2023]](https://gplfreetheme.in/wp-content/uploads/2021/07/how-to--300x155.jpg)